Showing posts with label computer tips. Show all posts

Saturday 8 February 2014

How To Check If Email Is Opened Or Not!


Yahoo and G mail
As many people would have noticed that, while sending some message via a Facebook, What’s Up when delivered or read by a particular person will status as seen and you can make a confirmation that message was delivered successful. Have you ever had a confirmation status while sending an email? Think so yet now you would have not. And also to make a note for you this feature is not available in Gmail or Yahoo.

Email conformation indeed is not that important till it’s needed to be. For instance when you send some important mail for your family, boss or client, you have to hang around till recipient has received the mail. This case will not be favorable at times and if recipient fails or ignores to send an reply you will surely be in a confused state whether mail is reached or not. So in order to deal with such situation, we will get notified you on sent email.

1. Using Right Box Chrome Extension: 

• By using Chrome extension Rightinbox you can track the sent email.

• On the first you have to install extension on your browser.

• Now open up inbox, if already opened then refresh it.

• Now Pop arises in screen, click the continue button and give access to Rightinbox to contact Gmail.

On completing these steps compose mail recipient and clack on to Track, send the mail. Once the recipient have opened and read your mail, you will be noticed with IP address and location. Hence this is also accommodating you o schedule Emails in future. Further support is Rightinbox send tracking email not based on extension browser. So you will get notification when you access tour mail from any other computer.

2. Banana Tag: 

To track sent mail form Gmail and yahoo anther technique is Banana Tag.

• Do you have an account in BananaTag; else you have to sign up for a new account.

• On completion of registration, you can get BananaTag extension for your browser.

The extension to your browser provided was a free version and you can rack up to only 5 mails per day. If you need to track more than 5 emails per day, all what you have to do is upgrade your account by crediting BananaTag.

Hence this an way to find out status of sent email. Try out and enjoy the new experience.

Wednesday 29 January 2014

How to Speed Up my Windows 8 PC to Work Faster - 10 Tips

Windows 8
I must say that windows 8 are faster that windows xp or windows 7, whether it’s the booting time or the performance, Windows 8 is ahead of all its previous versions. Are you facing slow issue with your windows 8 ? Its mainly due to lot of unwanted things running in the background or installation of too many apps. Lets see how we can make it work faster than before. Its easy to speed up your windows 8 pc. Below are some tips which you can try to speed up your windows 8 pc.

Remove/Disable Unnecessary services

You can remove/disable unwanted windows services which may be making the pc slow, to perform that

• Press Win + R to open RUN Window, then type the command msconfig in the box and Press enter.

• Now the box opened is System Configuration .In that Window navigate to the Services tab. Tick the checkbox of the Hide all Microsoft services, it will hide the windows services. Now the left upon services are third parties like Adobe , Google, Mozilla etc.These are actually unwanted services which might be eating up lot of resources, uncheck those services and click apply.

Manage Your Startup Programs

• Open the run command and type taskmgr to open the task manager window, navigate to the Startup tab.

• Now you can see lot of programs list which are installed in the pc, select the unwanted apps which you don’t want to startup along with system startup and disable them, now these apps won’t be starting along with system, you can manually start them anytime.

Disable Time-Wasting Animations

Windows 8 uses lot of animations while opening, closing windows, We can disable them.

• Open the run command and type SystemPropertiesAdvanced and press enter, It will open System properties With Advanced Tab. Click on the Setting button in the Performance section.

• Now in the Performance Options Window go to Custom, you will find a lot of effects which are ticked, untick them and apply.

Stop Windows Indexing

• Open the run command and type services.msc, press enter. Look for the Windows Search service in the list, right-click on it and select the option Properties.

• In properties Window, select the start up type as Disabled.

User Recommended Anti Virus

Instead of using third party antivirus programs, Use the Windows included Windows Defender , it’s the same antivirus as Microsoft Security Essentials.

Modify Power Settings

Windows 8`s power plans are same as earlier version of windows. To view the power plan settings, press on the Windows key, in the box type Power Plan, click Settings, and press Enter. Make sure you are using it in Balanced mode which is the recommended one.

Put Your Computer To Sleep

Instead of shutting down the computer put it in Sleep mode, In sleep mode the system goes into a low power state which consumes a very low power to keep the programs active. Using Sleep instead of shut down gradually increases the pc speed.

Optimize Your Hard Drives

In the earlier versions of windows there was a tool called Disk Defragmenter, its named as Optimize Drives too in windows 8. Though Windows 8 optimizes the drives once in a week automatically, it will be good if you make it twice a week.

Registry Cleaner: 

Actually people install and then uninstall lot of programs in the pc, even if you uninstall the program it leaves behind registry files which will remain in the system and after a period of time it can cause slowness, You need to cleanup these registries using a registry cleaner.

Install Latest Drivers : 

Always make sure you install the latest drivers for your hardware’s, if the hardware’s are updated your pc is sure to work better.

Monday 27 January 2014

How to Lock your Windows PC or Laptop with USB - Extra Security

Lock your Windows PC or Laptop with USB
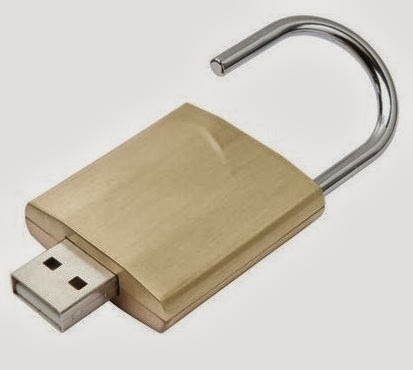
Have you ever imagined that you can use your USB drive as a lock to your desktop or laptop? Yes that is possible, it is such a fun thing that the USB drive will be acting as a key to your pc, if you remove the USB drive the system will get locked until you insert it again. Here I will tell you how to do that. It actually works through software called Predator. This kind of security lock is very significant and cool.

There are two links for this: Firstly the trail version Predator and the professional edition Predator. You can download it from these links. This trick works on all the versions of windows including windows 32 bit and 64 bit

Here are the Steps to lock your pc with USB: 

• Download the Predator software from the links mentioned above.

• After downloading the Predator software, connect your USB Drive to the system that acts as a key and then run the software for installation.

• In the mid of the installation you will be getting a pop up message asking for the password. You can enter the password which you want to set and then click OK to continue.

• You will get a pop up window for Preference settings, you can select your language, multiple monitor settings etc.

• Now add the USB Drive to the software by selecting the drive under Flash Drive settings and then click on the key it will generate a key on the USB device which will be used by Predator to monitor.

• You will be now able to see the Predator icon in the taskbar of your pc while the Predator program is running. The trial version of Predator offers usage for 1 month and its for non commercial usage only whereas Professional Edition has all the features and its completely for commercial, professional and single computer use.

• This Predator can even alarm on a high sound if someone enters invalid password that makes it very safe from strangers.

• It also records a activity log, by reading the log you can come to know whether somebody else tried to login to your pc.

When you remove the USB drive from the PC, the keyboard and mouse are actually disabled and the monitor screen darkens and when you are back just insert back the USB drive it will release your mouse and keyboard.

It's easier and faster for restarting your Windows session, and you do not have to retype your password again. Even if you lose your USB drive, you can use the password you have set while installing the software to unlock your pc, It also has a feature of sending alert emails to your mailbox and messages to Twitter. And last not the least PREDATOR can protect multiple desktops and laptops with the same USB flash drive.


I hope this will be useful for you so add an extra layer of security to your pc in a fun way.

How to Fix Blue Screen Error in Windows


Blue Screen Error in Windows
Blue Screen Error is a common issue that can be found in the Windows 8 and Windows 7 operating system, and is also called as Blue Screen of Death and it will make us to feel uncomfortable with the operating system. It will makes us to feel uncomfortable when we are working over the Desktop, and also when working with more important files.

Generally what is Blue Screen Error? 

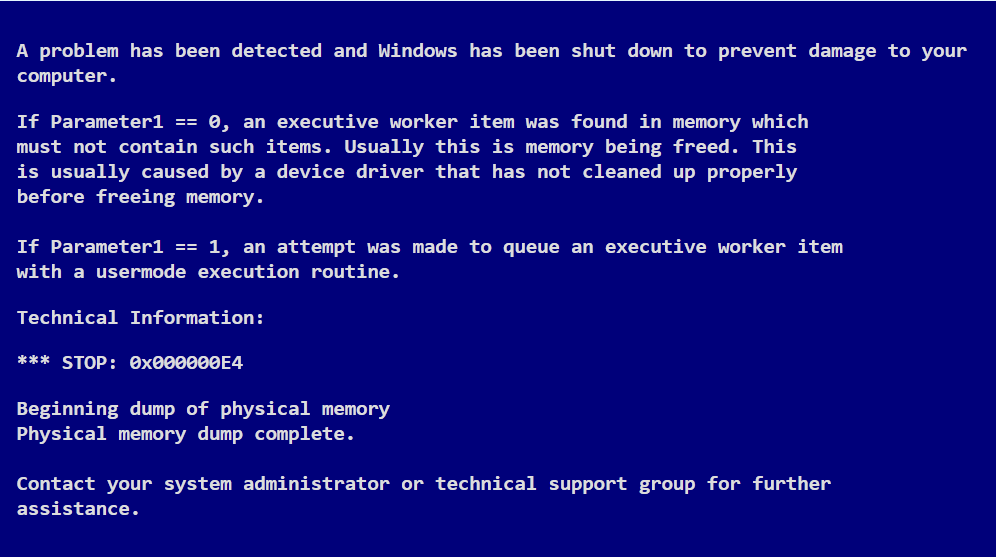
The Blue Screen Error is termed as an Error message which will be provided for the users to denote the critical issues that are going in your personal computer. If a serious problem occurs in your Windows 8 or Windows 7 operating system, then the Blue Screen Error will occur. It also shows you the message that states, Windows has been shut down to prevent the damage to your computer.

There are few severe problems that might happen in the hardware of the system or also with the drivers of the hardware. The Blue Screen Error can occur due to various reasons in the system hardware and also caused due to some software changes in the system.

In this post, I have shared a bit of information regarding how to fix the Blue Screen Error in your personal computer or in your laptop. Various reasons for the Blue Screen Error have been given below;

Problem with Your System Registries and its related items: 

Blue Screen Errorare also caused due to the various issues which are happening in the system registries, and if the problem exists, and also you can use the system registry cleaner to fix the issues which are related to the registry. Most of the people use the utility software to clean up the registry issues with your operating system.

Problem in Software programs: 

The Blue Screen Error is also caused due to the some issues which are related to the software that are used in your personal computer. If you have experience a Blue Screen Error after installing new software, then the software is responsible for the Blue Screen Error. So you can easily remove those installed applications in your personal computer to rectify the Blue Screen Error in your windows 8 and windows 7 operating system. You can uninstall the application by simply accessing Control Panel -> Add or Uninstall Programs -> uninstall the software package which you doesn’t need and also the application which cause Blue Screen Error in your personal computer.

Bugs in Software applications can cause Blue screen error. If Blue screen appears after installing new software, then restart your system and try to uninstall it and see if this solves the problem.

How to Avoid the Blue Screen Errors: 

1. Always use original edition of software to prevent Blue Screen Error and also avoid the pirated editions of the software. 2. Disable unwanted software program, this will provide reduce the Blue Screen Error in your personal computer. 3. Shut down your system properly,alwaystries to shut down properly in your personal computer. This will absolutely prevent the Blue Screen Error.

How to Dual Boot Windows 7/8 and Ubuntu

Dual Boot
Most of the people around this globe has own their personal computer and they can easily complete their various works by easily using their personal computers. The technology has made their life more portable, the laptops have been made their work more portable and they can easily use their laptop for various kinds of task.In this modern world of technology, we use operating system such as Windows 7/8, Mac OS and also many of the people use Linux Operating system. One operating system has a feature which doesn’t found in the; if anyone wants to use both operating system in their machine, then this post is suitable for you. In this post, I have shared information regarding how to boot dual boot in your computer, and here it go;
Steps for Dual Boot (Windows and Ubuntu)

Here you can found the various levels of steps for dual boot your personal computer with Windows Operating system with the Ubuntu.

Step 1: Open your Browser from the Windows operating system, and open the Ubuntu Website.

Step 2: Download WUBI from the Ubuntu website, and click on the Get the Installer in the Menu.

Step 3: Once you have clicked the Get the Installer over the Menu, you will be asked to select the various options and you will be asked to pay $2 for each services that you need to be installed in your personal computer.

Step 4: Now you need to slide down everything to zero (0), and then proceed to download.

Step 5: Now you will be asked to download the files which sized as 2.4MB and click the download files.

Step 6: Download the file and double click the wubi.exe and select yes to proceed.

Step 7: Now start installing the Ubuntu in your computer, provide the installation size to 18GB and select the environment as Ubuntu and select user account, provide user name and password to login into your windows account.

Step 8: Click install and it takes more than 15 minutes to install the Operating system in your personal computer.

 Step 9: After the Ubuntu operating system has been installed in your personal computer, restart your computer and wait for the Boot menu. You will find a menu which shows, Windows and Ubuntu Operating system to boot.

Step 10: Now just click your Operating system as Ubuntu by simply clicking the down arrow button in your Keyboard, this will select the operating system as Ubuntu in your personal computer.

Step 11: Now you need to select the packages which has to be installed as an additional packages in the Ubuntu Operating system, after selecting proceed to install. This will take few more minutes to install.

Step 12: Now you need to enter the username and password for your Ubuntu operating system, this will lead you to the Ubuntu operating desktop screen.

Now you have successfully booted the dual operating system in your computer successfully.

Wednesday 22 January 2014

How to make your own Folder Icons in the Windows XP operating system

folder
Windows XP operating system is one of the best operating system which is installed in most of the devices in this universe. Because of its simplicity, the Windows XP operating system is considered as the best operating system in the world. You can even notice that the people who were using the Windows XP operating system would never go for the latest upgrades of the Operating systems. Because of the ease in the Windows XP operating system, the people used to stay in the Windows XP operating system.

There few tips that can be still used by the people who were using the Windows XP operating system. In this post I have share a bit of information for the Windows XP operating system, and in this I have discussed the steps how to make your own folder icons in the Windows XP operating system.

Generally, we used to store different kinds of files and informations in the each folder. But the thing is that, the icons for the folder will look similarly. If you were changing the icons according to the kinds of information which are stored in a folder, then we can easily access the informations very easily and quickly too.
The steps are given as below;

Step 1: Right click over the Folder which you need to change the Icons in the Windows XP operating system. This will show you pop-up menu in the screen.

Step2: In the pop-up menu, select the Properties in the Menu.

Step3: In the property window which you have selected, click the customize tab in the menu and also click on the change Icon button.

Step4: After clicking the Change Icon button, the pop-up box with series of icons and pictures is available for you. You can click on the any image you want and you can select the icons to be the Folder Icon for your Folder. This helps you to choose the Folder icon in the Windows XP operating system.

How to add extra Icons on the Icon Menu: 

If you want to use a custom image as your icon in the Windows XP operating system, you have to add your image in the %SystemRoot%\system32\SHELL32.dll.

-> In order to make your image as a custom icon, select an image which you want to make as icon. • Open an image editor application on your personal computer.

• Now crop the image into the size of 24 x 24 pixel or 16 x 16 pixel resolution in the image processor.

• Now save that image into 24-bit bitmap image from the image processor.

• Now repeat up to step-3 in the folder, and then you need the click on the browse button near the top of the image.

• You have to choose the image which you have changed into the bitmap format. Then select Ok button. Finally you have changed the custom icon in the Windows XP.

How to Connect All your Computers with Single Mouse and Keyboard

KVM Switch
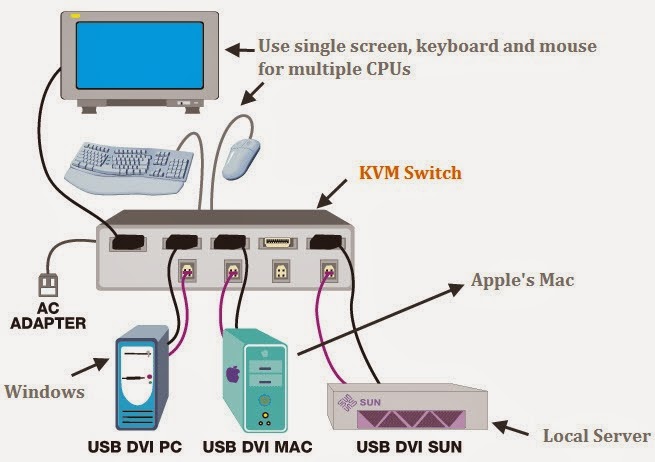
Nowadays it’s a common thing having multiple Systems in their home like a Desktop and a laptop, Even there are a lot of people who work with two or say multiple desktop computers and its hectic to work with two mouse and two keyboards, Did you ever heard that we can actually operate multiple computers using a Single mouse and keyboard? Yes that’s possible using various methods, So here are a few methods which we can try to overcome that.

This can be done through hardware and software either ways but the important thing is the computers should be connected to each other via LAN or any Network connector.

1. KVM (Keyboard, Video, Mouse) switch, its hardware or say a cable in specific which will be a short one for keyboard, video and mouse. These are actually commonly used in Datacenters where lot of servers are placed in a single rack with a single keyboard, monitor and mouse. It will let you share a single mouse, keyboard and monitor across two or multiple computers. There is also KM switch cables using which you will be able to share a single keyboard and mouse with two computers that have two separate monitors. The best thing about using these hardware cables is they give really fast connections which makes it worth to go and makes the work more efficient. One of the main advantage of using KVM switch is that it saves space which would have been occupied if multiple keyboards, mouse are used.

2. If you don’t want to add any hardware cables there are a few software’s too which we can try, First thing to try out is Input Director, which is a Windows-only utility that’s easy to install and is totally free for non-commercial use. At first, you need to install this Input Director program on all your Computers. The computer that is physically connected by keyboard and mouse becomes the Master computer whereas the other systems will be Slave computers. Just make sure you never shut down the Master computer without turning off the Slave computers first because by doing that you will lose access to the keyboard and mouse which are physically attached to the master computer. There`s another program called Synergy , this one is a bit harder to setup than Input Director , but it’s free and a open-source thing which supports Microsoft windows, MAC OS and Linux. Both these programs are small ones which won’t eat up much resource your computers. On using both the software’s you don’t need to press any switches or buttons which was there in the case of KVM switches. Simply just move your cursor to drag drop or copy paste across your multiple computers in a easy manner. 

People who don’t mind spending for a peaceful computing will love to go for the hardware way and the Users who don’t like to spend money and want a clean desk without messing with cables will go the software way. Happy Computing.